
How to install theme in WordPress
Are you ready to give your WordPress website a fresh new look? One of the best ways to do that is by installing a new theme. Whether you’re a seasoned WordPress user or just getting started, changing your theme can breathe new life into your site and help you achieve the look and functionality you desire. In this guide, we’ll walk you through the step-by-step process of how to install theme in WordPress, covering different methods to suit your preferences and needs.
1: Installing a Theme from the WordPress Theme Directory
- Access the WordPress Dashboard: Log in to your WordPress website and navigate to the Dashboard.
- Go to Appearance > Themes: In the Dashboard, locate the “Appearance” tab in the sidebar menu. Click on “Themes” to enter the themes management section.
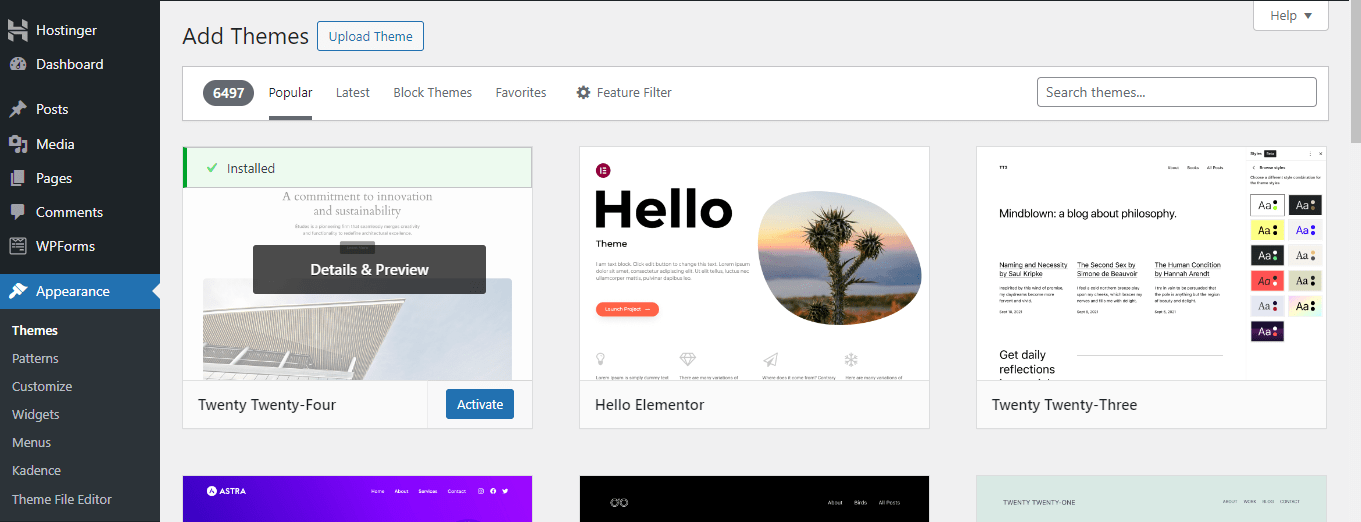
- Click on “Add New”: Once you’re in the Themes section, you’ll see an option to “Add New.” Click on it to access the WordPress Theme Directory.
- Browse or Search for Themes: You can browse through the featured themes or use the search bar to find a specific theme by name, keyword, or functionality.
- Preview and Install: Hover over a theme to see a preview. Once you find a theme you like, click on the “Install” button to install it.
- Activate the Theme: After installation, you’ll be prompted to activate the theme. Click on “Activate” to make it your current theme.
2: Uploading a Theme from Your Computer
- Obtain the Theme Zip File: If you’ve purchased or downloaded a theme from a third-party source, make sure you have the theme file in .zip format saved on your computer.
- Access the WordPress Dashboard: Follow the same steps as in Method 1 to access the Themes section in your WordPress Dashboard.
- Click on “Add New” > “Upload Theme”: Instead of browsing the WordPress Theme Directory, click on the “Upload Theme” button located at the top of the page.
- Choose File and Upload: Click on the “Choose File” button and select the theme .zip file from your computer. Then click on “Install Now” to upload the theme to your WordPress site.
- Activate the Theme: Once the theme is uploaded and installed, you’ll see a success message. Click on the “Activate” link to make the theme active on your website.
3: Installing a Theme via FTP
- Access Your WordPress Files: Connect to your website via FTP using an FTP client like FileZilla or Cyberduck.
- Navigate to the Themes Directory: Once connected, locate the “wp-content” folder and inside it, find the “themes” folder.
- Upload the Theme Folder: Unzip the theme file on your computer and upload the theme folder to the “themes” directory on your server.
- Activate the Theme: After the theme folder is uploaded, log in to your WordPress Dashboard. Go to Appearance > Themes, and you should see your newly uploaded theme listed. Click on “Activate” to make it your active theme.
Conclusion
Installing a theme in WordPress is a simple process that allows you to customize the appearance and functionality of your website. Whether you choose a theme from the WordPress Theme Directory, upload one from your computer, or install it via FTP, you have the flexibility to find the perfect look for your site. Experiment with different themes until you find the one that best suits your needs and enhances your WordPress experience. Happy theming!